As SharePoint 2010 gets popular, more and more scenarios are coming which most of required customization.
As we know SharePoint 2010 provides many options to customize the SharePoint Website, some of listed below…
1. Visual Studio Development
2. SilverLight Devlopment
3. ECMA Script Development
4. JQuery
In this post I am exploring the JQuery Development possibilities in SharePoint 2010.
As jQuery is a fast and concise JavaScript Library. We can easily give dynamic look to SharePoint Website and can also add custom business logic.
Let start the demonstration….
Take a scenario that we have to create Employee Registration Form with Tabular look and also enable disable tabs according to check box or radio button selection.
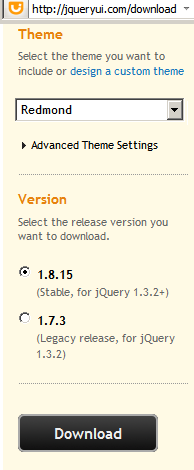
1. First of all Download JQuery from jqueryui.com
2. Extract downloaded zip file and Copy all files into SharePoint Site (You can copy all files to Document Library or Can do Drag and drop using SharePoint Designer)

3. Add following JQuery References to master page before </head> tag.
<!--JQuery References -->
<link type="text/css" href="jquery-ui-1.8.15.Redmond/css/redmond/jquery-ui-1.8.15.custom.css" rel="stylesheet" />
<script type="text/javascript" src="jquery-ui-1.8.15.Redmond/js/jquery-1.6.2.min.js"></script>
<script type="text/javascript" src="jquery-ui-1.8.15.Redmond/js/jquery-ui-1.8.15.custom.min.js"></script>

4. Create SharePoint List.
For demo purpose I have created Employees List and added 5-8 columns.

5. Create a new list Form of type New Item.(You can set it as default)

6. Edit List form in Advanced Mode.

7. As we want to display form in tabular, so we have to add JQuery Tab schema as follows ..
| <!-- Tabs --> <h2 class="demoHeaders"> Employee Registration Form</h2> <div id="tabs"> <ul> <li><a href="#tabs-1">Personal</a></li> <li><a href="#tabs-2">Contact</a></li> <li><a href="#tabs-3">Office</a></li> <li><a href="#tabs-4">New Hire</a></li> <li><a href="#tabs-5">Contractor</a></li> <li><a href="#tabs-6">Desktop</a></li> <li><a href="#tabs-7">Laptop</a></li> </ul> <div id="tabs-1"> <table border="0" cellspacing="0" width="100%"> </table> </div> <div id="tabs-2"> <table border="0" cellspacing="0" width="100%"> </table> </div> <div id="tabs-3"> <table border="0" cellspacing="0" width="100%"> </table> </div> </div> |

9. Open newly create list form in browser; Select edit page from Page Tab.
Add "HTML Form Web Part", go to WebPart properties; add following code using "Source Editor".
<script type="text/javascript">
$(function(){ // Tabs $('#tabs').tabs(); }); </script> <script type="text/javascript"> $(document).ready(function () { //debugger; $('#tabs').tabs("option", "disabled", [3, 4, 5, 6]); $('input:radio').each( function () { this.onclick = function () { RadioBtnEvent(this) }; } ); $('input:checkbox').each( function () { this.onclick = function () { CheckBoxEvent(this) }; } ); }); function RadioBtnEvent(RedioBtn) { if (RedioBtn.parentElement.title == "New Hire") { if (RedioBtn.checked) { EnableTab(3); DisbleTab(4); } else { DisbleTab(3); } } else if (RedioBtn.parentElement.title == "Contractor") { if (RedioBtn.checked) { EnableTab(4); DisbleTab(3); } else DisbleTab(4); }else { DisbleTab(5); DisbleTab(6); } } function CheckBoxEvent(CheckBoxCtrl) { if (CheckBoxCtrl.parentElement.title == "Desktop") { if (CheckBoxCtrl.checked) EnableTab(5); else DisbleTab(5); } else if (CheckBoxCtrl.parentElement.title == "Laptop") { if (CheckBoxCtrl.checked) EnableTab(6); else DisbleTab(6); } } function EnableTab(TabIndex) { $('#tabs').tabs('enable', TabIndex); } function DisbleTab(TabIndex) { $('#tabs').tabs('disable', TabIndex); } </script> |
10. Output

Great its working fine for me..........
ReplyDeleteand I was expecting the same..!!!
Thanks & regards
Vishal Wattamwar