Showing posts with label SharePoint 2010. Show all posts

Tuesday, May 22, 2012

SharePoint 2010 Capacity Planning

This article provides an overview of how to effectively plan and manage the capacity of SharePoint 2010 environments. This article also describes how to maintain a good understanding of the capacity needs and capabilities of your deployment, by analysis of performance and volume data.

Capacity management is an ongoing process, You need to plan for growth and change, so that your SharePoint Server 2010–based environment can continue to deliver an effective business solution.
The capacity management model includes additional steps to help you validate and tune the initial architecture, and provides a feedback loop for re-planning and optimizing the production environment until it can support design goals with optimal choices of hardware, topology, and configuration.

# The following specialized terms are used in SharePoint 2010 capacity management:

RPS:   Requests per second. The number of requests received by a farm or server in one second.
Peak hours:   The time or times during the day when load on the farm is at its maximum.
Peak load :  The average maximum daily load on the farm, measured in RPS.
Load spike:   Transient load peaks that fall outside usual peak hours. These can be caused by unplanned increases in user traffic, decreased farm throughput because of administrative operations, or combinations of such factors.
Scale up:   To scale up means to add resources such as processors or memory to a server.
Scale out :  To scale out means to add more servers to a farm.
Throughput:  Throughput is defined as the number of concurrent requests that a server or server farm can process.


# Limits and boundaries:
Web application limits

Content database size ( general usage scenarios)
200 GB per content database
Content database items
60 million items including documents and list items
Site collections per content database
2,000 recommended
5,000 maximum
Web site
250,000 per site collection
Site collection size
Maximum size of the content database
Web parts
25 per wiki or Web part page

List and library limits
The following table lists the recommended guidelines for lists and libraries.
List row size8,000 bytes per row
File sizeThe default maximum file size is 50 MB and  Maximum 2 GB.
Documents30,000,000 per library
Major versions400000
Items30,000,000 per list
List view lookup threshold8 join operations per query
List view threshold5000
List view threshold for auditors and administrators20000
Subsite2,000 per site view

Column limits
SharePoint Server 2010 data is stored in SQL Server tables.

Single line of text28 bytes
Multiple Lines of Text28 bytes
Choice28 bytes
Number12 bytes
Date and Time12 bytes
Lookup4 bytes
Yes / No5 bytes
Person or group4 bytes
Hyperlink or picture56 bytes
Calculated28 bytes

Blog limits
The following table lists the recommended guidelines for blogs.

Blog posts5,000 per site
Comments1,000 per post


Groups limits 

Number of SharePoint groups a user can belong to5000
Users in a site collection2 million per site collection
Active Directory Principles/Users in a SharePoint group5,000 per SharePoint group
SharePoint groups10,000 per site collection


References:
2.       Column limits

Wednesday, February 29, 2012

Quick Notes: SharePoint Solution Deployment Commands - PowerShell

------------Add Snippet-------------------------
"C:\Program Files\Common Files\Microsoft Shared\Web Server Extensions\14\CONFIG\POWERSHELL\Registration\SharePoint.ps1"
Add-PSSnapin Microsoft.SharePoint.PowerShell
------------Add Solution-------------------------
Add-SPSolution "E:\SPSolutions\SharePoint. Finance.wsp"
Install-SPSolution –Identity SharePoint.Finance.wsp –WebApplication " http://SPServer:1000/" –GACDeployment -force
------------Update  Solution-------------------------
Update-SPSolution –Identity SharePoint.Finance.wsp –LiteralPath "E:\SPSolutions\SharePoint. Finance.wsp" –GacDeployment
------------Add Feature------------------------
Install-SPFeature Feature1 -force
Enable-SPFeature –Identity Feature1 –url "http://SPServer:1000/sites/Finance/"
------------Remove Feature------------------------
Uninstall-SPFeature Feature1
Disable-SPFeature –Identity Feature1 –url "http://spserver:1000/sites/Finance/"   

Microsoft has provided a tool to design PowerShell commands for SharePoint
Check this...
http://www.microsoft.com/resources/TechNet/en-us/Office/media/WindowsPowerShell/WindowsPowerShellCommandBuilder.html

Tuesday, December 27, 2011

Estimate content database storage - SharePoint 2010

This article describes how to plan for and configure the storage and Microsoft SQL Server database tier in a SharePoint 2010 environment.
The capacity planning information in this article provides guidelines for you to use in your planning. It is based on testing performed at Microsoft on live properties. However, your results may vary based on the equipment you use and the features and functionality that you implement for your sites.
This article assumes that you are familiar with the concepts presented in Capacity management and sizing for SharePoint Server 2010.
Estimate content database storage
The following process describes how to approximately estimate the storage required for content databases, without considering log files:
1.       Calculate the expected number of documents. This value is referred to as D in the formula.
2.       Estimate the average size of the documents that you will be storing. This value is referred to as S in the formula.
3.       Estimate the number of list items in the environment. This value is referred to as L in the formula. List items are more difficult to estimate than documents.
4.       Determine the approximate number of versions. This value is referred to as V in the formula. The value of V must be above zero.
5.       Use the following formula to estimate the size of your content databases:
Database size = ((D × V) × S) + (10 KB × (L + (V × D)))
The value of 10 KB in the formula is a constant that roughly estimates the amount of metadata required by SharePoint Server 2010. If your system requires significant use of metadata, you may want to increase this constant.
As an example, if you were to use the formula to estimate the amount of storage space required for the data files for a content database in a collaboration environment with the following characteristics, you would need approximately 105 GB.


Input
Value
Number of documents (D)
200,000
Calculated by assuming 10,000 users times 20 documents
Average size of documents (S)
250 KB
List items (L)
600,000
Number of non-current versions (V)
2
Assuming that the maximum versions allowed is 10


Database size = (((200,000 x 2)) × 250) + ((10 KB × (600,000 + (200,000 x 2))) = 110,000,000 KB or 105 GB

Download the Excel sheet for easy calculations.

Monday, October 31, 2011

Hiding Group Headers from SharePoint List View


We can hide the Group name in out of the box list view using JavaScript.
Grouped List View before adding JavaScript:


JavaScript (MOSS 2007/WSS 3.0):
<script type="text/javascript" language="javascript">
        _spBodyOnLoadFunctionNames.push("HideHeaders");

        function HideHeaders() {
            var elements = getElementsByClassName(document, "td", "ms-gb");
            var elem;
            for (var i = 0; i < elements.length; i++) {
                elem = elements[i];
                elem.childNodes[3].style.display = "none";
                elem.childNodes[4].nodeValue = elem.childNodes[4].nodeValue.replace(':', '');
            }

            elements = getElementsByClassName(document, "td", "ms-gb2");

            for (var i = 0; i < elements.length; i++) {
                elem = elements[i];
                elem.childNodes[3].style.display = "none";
                elem.childNodes[4].nodeValue = elem.childNodes[4].nodeValue.replace(':', '');
            }
        }

        function getElementsByClassName(oElm, strTagName, strClassName) {
            var arrElements = (strTagName == "*" && oElm.all) ? oElm.all : oElm.getElementsByTagName(strTagName);
            var arrReturnElements = new Array();
            strClassName = strClassName.replace(/\-/g, "\\-");
            var oRegExp = new RegExp("(^|\\s)" + strClassName + "(\\s|$)");
            var oElement;
            for (var i = 0; i < arrElements.length; i++) {
                oElement = arrElements[i];
                if (oRegExp.test(oElement.className)) {
                    arrReturnElements.push(oElement);
                }
            }
            return (arrReturnElements)
        }
    </script>
JavaScript (SharePoint 2010/SharePoint Foundation 2010):
<script type="text/javascript" language="javascript">
        _spBodyOnLoadFunctionNames.push("HideHeaders");

        function HideHeaders() {
            var elements = getElementsByClassName(document, "td", "ms-gb");
            var elem;
            for (var i = 0; i < elements.length; i++) {
                elem = elements[i];
                elem.childNodes[0].childNodes[1].nodeValue = "";
                elem.childNodes[1].nodeValue = elem.childNodes[1].nodeValue.replace(':', '');
            }

            elements = getElementsByClassName(document, "td", "ms-gb2");

            for (var i = 0; i < elements.length; i++) {
                elem = elements[i];
                elem.childNodes[1].childNodes[1].nodeValue = "";                elem.childNodes[2].nodeValue = elem.childNodes[2].nodeValue.replace(':', '');
            }
        }

        function getElementsByClassName(oElm, strTagName, strClassName) {
            var arrElements = (strTagName == "*" && oElm.all) ? oElm.all : oElm.getElementsByTagName(strTagName);
            var arrReturnElements = new Array();
            strClassName = strClassName.replace(/\-/g, "\\-");
            var oRegExp = new RegExp("(^|\\s)" + strClassName + "(\\s|$)");
            var oElement;
            for (var i = 0; i < arrElements.length; i++) {
                oElement = arrElements[i];
                if (oRegExp.test(oElement.className)) {
                    arrReturnElements.push(oElement);
                }
            }
            return (arrReturnElements)
        }
    </script>


Grouped List View after adding JavaScript:

Enjoy!

Tuesday, August 9, 2011

Change look and feel of SharePoint Page using JQuery or Apply business logic to SharePoint List Forms using JQuery


As SharePoint 2010 gets popular, more and more scenarios are coming which most of required customization.
As we know SharePoint 2010 provides many options to customize the SharePoint Website, some of listed below…
 
1.    Visual Studio Development
2.    SilverLight Devlopment
3.    ECMA Script Development
4.    JQuery


In this post I am exploring the JQuery Development possibilities in SharePoint 2010.
As jQuery is a fast and concise JavaScript Library. We can easily give dynamic look to SharePoint Website and can also add custom business logic.
Let start the demonstration….

Take a scenario that we have to create Employee Registration Form with Tabular look and also enable disable tabs according to check box or radio button selection.

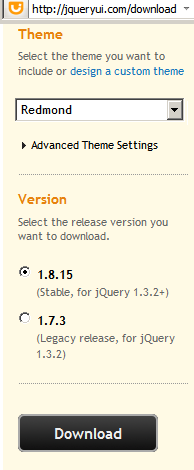
1.    First of all Download JQuery from jqueryui.com

2.    Extract downloaded zip file and Copy all files into SharePoint Site (You can copy all files to Document Library or Can do Drag and drop using SharePoint Designer)


3.    Add following JQuery References to master page before </head> tag.

 <!--JQuery References --> 
<link type="text/css" href="jquery-ui-1.8.15.Redmond/css/redmond/jquery-ui-1.8.15.custom.css" rel="stylesheet" />     
<script type="text/javascript" src="jquery-ui-1.8.15.Redmond/js/jquery-1.6.2.min.js"></script> 
<script type="text/javascript" src="jquery-ui-1.8.15.Redmond/js/jquery-ui-1.8.15.custom.min.js"></script>


4.   Create SharePoint List.
      For demo purpose I have created Employees List and added 5-8 columns.

5.    Create a new list Form of type New Item.(You can set it as default)


6.   Edit List form in Advanced Mode.


7.    As we want to display form in tabular, so we have to add JQuery Tab schema as follows ..


<!-- Tabs -->
<h2 class="demoHeaders"> Employee Registration Form</h2>
<div id="tabs">
    <ul>
        <li><a href="#tabs-1">Personal</a></li>
        <li><a href="#tabs-2">Contact</a></li>
        <li><a href="#tabs-3">Office</a></li>
        <li><a href="#tabs-4">New Hire</a></li>
        <li><a href="#tabs-5">Contractor</a></li>
        <li><a href="#tabs-6">Desktop</a></li>
        <li><a href="#tabs-7">Laptop</a></li>   
              </ul>
    <div id="tabs-1">
                   <table border="0" cellspacing="0" width="100%">

                   </table>
              </div>
    <div id="tabs-2">
                   <table border="0" cellspacing="0" width="100%">

                   </table>
              </div>
    <div id="tabs-3">
                   <table border="0" cellspacing="0" width="100%">

                   </table>
              </div>
</div>

8.    Modify JQuery Schema, Add columns to respective tab DIV;


 9.    Open newly create list form in browser; Select edit page from Page Tab.
        Add "HTML Form Web Part", go to WebPart properties; add following code using "Source Editor".


<script type="text/javascript">
            $(function(){
                // Tabs
                $('#tabs').tabs();                           
            });
</script>
<script type="text/javascript">
    $(document).ready(function () {
        //debugger;
        $('#tabs').tabs("option", "disabled", [3, 4, 5, 6]);
        $('input:radio').each(
                  function () {
                      this.onclick = function () { RadioBtnEvent(this) };
                  }
              );
        $('input:checkbox').each(
                  function () {
                      this.onclick = function () { CheckBoxEvent(this) };
                  }
              );
    });

    function RadioBtnEvent(RedioBtn) {
        if (RedioBtn.parentElement.title == "New Hire") {
             if (RedioBtn.checked) { EnableTab(3); DisbleTab(4); }
            else { DisbleTab(3); }
          
        }
        else if (RedioBtn.parentElement.title == "Contractor") {
             if (RedioBtn.checked) { EnableTab(4); DisbleTab(3); }
            else DisbleTab(4);
          
        }else {
            DisbleTab(5);
            DisbleTab(6);
        }
    }

    function CheckBoxEvent(CheckBoxCtrl) {
        if (CheckBoxCtrl.parentElement.title == "Desktop") {
           if (CheckBoxCtrl.checked) EnableTab(5);
            else DisbleTab(5);
        }
        else if (CheckBoxCtrl.parentElement.title == "Laptop") {
           if (CheckBoxCtrl.checked) EnableTab(6);
            else DisbleTab(6);
        }
      
    }

    function EnableTab(TabIndex) {
        $('#tabs').tabs('enable', TabIndex);
    }

    function DisbleTab(TabIndex) {
        $('#tabs').tabs('disable', TabIndex);
    }
</script>

10.    Output

Conclusion: We can use JQuery in SharePoint 2010; And it takes less time to use JQuery in SharePoint but more time to post a blog on it.

Wednesday, May 4, 2011

SharePoint 2010: How to create custom list form using InfoPath Designer 2010

Actually, I didn’t created custom list forms in InfoPath, but may be in future for POC purpose I will be use it..
While swing on the internet, I found a very good article on InfoPath form design, so i just want to share this article..
Following is the article link…

Wednesday, December 29, 2010

My First Silverlight and SharePoint 2010 application using client side object model

This is my first post on Silverlight + SharePoint 2010 and it will take you through a very simple example of using a Silverlight application in SharePoint 2010, using the new SharePoint 2010 Client Object Model.
I will also show how to do deployment of Silverlight application in SharePoint 2010.
Visual Studio 2010 provides good development tools for SharePoint 2010 as well as for Silverlight.
Note that I will not be getting into the details of creating a flashy User interface (UI) in Silverlight – i will just create a very simple UI with a Data Grid view, text boxes and buttons.

The Example is divided into 3 sections.  As follows…..
  1. Create UI in Silverlight.
  2. Use Client side object model to Add, Update, Delete and retrieve records of SharePoint 2010 list from Silverlight 4 Application.
  3. Create a SharePoint 2010 solution which will deploy a Silverlight XAP file to SharePoint.

Section 1: Create UI in Silverlight

I am going to create a simple Silverlight form for Contact Management. And it contains two textboxes, two buttons (Add and Update) and one Data Grid View with three columns (Name, Address and Actions). 

1. First of all create one Silverlight Application for that go to New Project > Select Silverlight > Select Silverlight Application > Enter Name of Application.
2. Uncheck the “Host the Silverlight application in a new web site” option. We don’t need it. And select Silverlight version probably 4.
     3.Open MainPage.xaml file in Design mode. And add two textboxes, two buttons (Add and Update) and one Data Grid View. Page will look like this…
4. Open MainPage.xaml file in XAML mode. And addfollowing XMAL code in Data Grid tag for columns creation. There are three columns first is Name, second is Address and third is Actions. Actions column contains two image buttons Edit and Delete.
XAML Code
<data:DataGridAutoGenerateColumns="False" Height="140"HorizontalAlignment="Left" Margin="7,153,0,0" Name="DataGridContacts"IsReadOnly="True"VerticalAlignment="Top" Width="379" >
<data:DataGrid.Columns>
<data:DataGridTextColumn Binding="{Binding Name}" Header="Name" Width="150" />
<data:DataGridTextColumn Binding="{Binding Address}" Header="Address" Width="150" />
<data:DataGridTemplateColumn Header="Actions">
<data:DataGridTemplateColumn.CellTemplate>
<DataTemplate>
<StackPanelVerticalAlignment="Center">
<GridVerticalAlignment="Center" Width="70">
<Grid.ColumnDefinitions>
<ColumnDefinition Width="*" />
</Grid.ColumnDefinitions>
<Button x:Name="btnEdit"Grid.Column="0"CommandParameter="{Binding ID}" Content="{Binding ID}" Width="23" Height="23" Click="btnEdit_Click">
<Button.Template>
<ControlTemplate>
<Image Source="/SilverlightDataEntryApplication;component/Images/Edit.png" Height="23" Width="23" />
</ControlTemplate>
</Button.Template>
<ToolTipService.ToolTip>
<ToolTip Content="Edit Contact"></ToolTip>
</ToolTipService.ToolTip>
</Button>
<Button x:Name="btnDelete"Grid.Column="1" Margin="5" Click="btnDelete_Click"CommandParameter="{Binding ID}">
<Button.Template>
<ControlTemplate>
<Image Source="/SilverlightDataEntryApplication;component/Images/Delete.png" Height="25" Width="25" />
</ControlTemplate>
</Button.Template>
<ToolTipService.ToolTip>
<ToolTip Content="Delete Contact"></ToolTip>
</ToolTipService.ToolTip>
</Button>
</Grid>
</StackPanel>
</DataTemplate>
</data:DataGridTemplateColumn.CellTemplate>
</data:DataGridTemplateColumn>
</data:DataGrid.Columns>
</data:DataGrid>

Section 2: Use Client side object model to Add, Update,Delete and retrieve records of SharePoint 2010 list from Silverlight 4 Application.

1.    Add Microsoft.SharePoint.Client.Silverlight.dll and Microsoft.SharePoint.Client.Silverlight.Runtime.dll references in the project.
2.       Add code in MainPage.xaml.cs file. The following example shows how to create, Update and delete a list item in a specific SharePoint 2010 list.
Here I have demonstrated two differentmethods to access data from SharePoint 2010 List.
The example uses a delegate to Add, update and Delete the information of the item in the UI. And the example uses BackgroundWorkerthread for retrieving items from SharePoint 2010 list.
NoteImportant!
While accessing data from multiple lists, you cannot use delegate to access data, for the same you can useBackgroundWorker.
We cannot run the data retrieval methods on UI thread of the Silverlight Application. For that we have to create a new thread using BackgroundWorkerand call data retrieval methods from the new thread’s DoWork method.
C# Code
using System;
usingSystem.Collections.ObjectModel;
usingSystem.ComponentModel;
usingSystem.Windows;
usingSystem.Windows.Controls;
usingMicrosoft.SharePoint.Client;
namespaceSilverlightDataEntryApplication
{
publicpartialclassMainPage : UserControl
    {
        #region Global Variables
BackgroundWorkerbwLoadContacts = newBackgroundWorker();
ObservableCollection<ContactInfo>gContactCollection = null;
intgSelectedID = 0;
stringgSelectedName = string.Empty;
stringgSelectedAddress = string.Empty;
ListItemgListItem = null;
        #endregion
publicMainPage()
        {
InitializeComponent();
bwLoadContacts.DoWork += newDoWorkEventHandler(bwLoadContacts_DoWork);
bwLoadContacts.RunWorkerCompleted += newRunWorkerCompletedEventHandler(bwLoadContacts_RunWorkerCompleted);
LoadContacts();
        }
        #region Load Contacts from SharePoint List and Bind to DataGrid
privatevoidLoadContacts()
        {
//Run BackgroundWorker Thread Here!
if (!bwLoadContacts.IsBusy)
            {
bwLoadContacts.RunWorkerAsync();
            }
        }
voidbwLoadContacts_DoWork(object sender, DoWorkEventArgs e)
        {
//Write Data Retrival Code Here!
ClientContextoClientContext = newClientContext(ApplicationContext.Current.Url);
ListoList = oClientContext.Web.Lists.GetByTitle("Contacts");
oClientContext.Load(oList);
CamlQueryoCamlQuery = newMicrosoft.SharePoint.Client.CamlQuery();
            #region CAML
stringstrCAMLQueryXML = string.Format(@"<View>
<Query>
<OrderBy>
<FieldRef Name='Name' />
</OrderBy>
</Query>
</View>");
            #endregion
oCamlQuery.ViewXml = strCAMLQueryXML;
ListItemCollectionoListItemCollection = oList.GetItems(oCamlQuery);oClientContext.Load(oListItemCollection);
oClientContext.ExecuteQuery();//Execute Query Synchronously
gContactCollection = newObservableCollection<ContactInfo>();
foreach (ListItemoIteminoListItemCollection)
            {
ContactInfo contact = newContactInfo();
                contact.ID = oItem.Id;
contact.Name = Convert.ToString(oItem["Name"]);
contact.Address = Convert.ToString(oItem["Address"]);
gContactCollection.Add(contact);//Add to global Variable
            }
        }
voidbwLoadContacts_RunWorkerCompleted(object sender, RunWorkerCompletedEventArgs e)
        {
//Write Data Binding Code Here!
DataGridContacts.ItemsSource = gContactCollection;
TxtName.Text = "";
TxtAddress.Text = "";
        }
        #endregion
privatevoidBtnAdd_Click(object sender, RoutedEventArgs e)
        {
LblMessage.Content = "Adding Record...";
gSelectedName = TxtName.Text;
gSelectedAddress = TxtAddress.Text;
ClientContextoClientContext = newClientContext(ApplicationContext.Current.Url);
ListoList = oClientContext.Web.Lists.GetByTitle("Contacts");
oClientContext.Load(oList);
gListItem = oList.AddItem(newListItemCreationInformation());
gListItem["Name"] = TxtName.Text;
gListItem["Address"] = TxtAddress.Text;
gListItem.Update();
oClientContext.Load(gListItem);
oClientContext.ExecuteQueryAsync(OnRequestSucceeded, null);
        }
privatevoidBtnUpdate_Click(object sender, RoutedEventArgs e)
        {
LblMessage.Content = "Updating Record...";
ClientContextoClientContext = newClientContext(ApplicationContext.Current.Url);
ListoList = oClientContext.Web.Lists.GetByTitle("Contacts");
oClientContext.Load(oList);
gListItem = oList.GetItemById(gSelectedID);
gListItem["Name"] = TxtName.Text;
gListItem["Address"] = TxtAddress.Text;
gListItem.Update();
oClientContext.Load(gListItem);
oClientContext.ExecuteQueryAsync(OnRequestSucceeded, null);
        }
privatevoidbtnDelete_Click(object sender, RoutedEventArgs e)
        {
if (MessageBox.Show("Are you sure you want to remove this contact?","Delete Contact",MessageBoxButton.OKCancel) == MessageBoxResult.OK)
            {
//Delete Record
LblMessage.Content = "Deleting Record...";
Button _btn = (Button)sender;
int ID = Convert.ToInt32(_btn.CommandParameter.ToString());
ClientContextoClientContext = newClientContext(ApplicationContext.Current.Url);
ListoList = oClientContext.Web.Lists.GetByTitle("Contacts");
oClientContext.Load(oList);
gListItem = oList.GetItemById(ID);
gListItem.DeleteObject();
oClientContext.Load(oList);
oClientContext.ExecuteQueryAsync(OnRequestSucceeded, null);
            }
        }
privatevoidOnRequestSucceeded(Object sender, ClientRequestSucceededEventArgsargs)
        {
// this is not called on the UI thread          
Dispatcher.BeginInvoke(ShowMessage);
        }
privatevoidShowMessage()
        {
LblMessage.Content = "Operation Completed Successfully!";
LoadContacts();
        }
privatevoidbtnEdit_Click(object sender, RoutedEventArgs e)
        {           
Button _btnEdit = (Button)sender;
gSelectedID = Convert.ToInt32(_btnEdit.CommandParameter.ToString());
GetContactByID(gSelectedID);
        }
privatevoidGetContactByID(int ID)
        {
ClientContextoClientContext = newClientContext(ApplicationContext.Current.Url);
ListoList = oClientContext.Web.Lists.GetByTitle("Contacts");
oClientContext.Load(oList);
gListItem = oList.GetItemById(ID);
oClientContext.Load(gListItem);
//gContentsCollection.RetrieveItems().Retrieve();
oClientContext.ExecuteQueryAsync(OnRequestSucceeded_Load, null);
        }
privatevoidOnRequestSucceeded_Load(Object sender, ClientRequestSucceededEventArgsargs)
        {
// this is not called on the UI thread          
Dispatcher.BeginInvoke(BindData);
        }
privatevoidBindData()
        {
gSelectedID = gListItem.Id;
TxtName.Text = Convert.ToString(gListItem["Name"]);
TxtAddress.Text = Convert.ToString(gListItem["Address"]);
        }       
    }
publicclassContactInfo
    {
publicint ID { get; set; }
publicstring Name { get; set; }
publicstring Address { get; set; }
    }
}

Section 3: Create a SharePoint 2010 solution which will deploy a Silverlight XAP file to SharePoint.

1.       Create an Empty SharePoint 2010 project with Deploy on farm solution is checked.
2.       Map ClientBin SharePoint folder from layouts.

3.       Create a new folder as ContactsDemoin ClientBin folder.
4.       Add post-build command as “xcopy  "$(TargetDir)SilverlightDataEntryApplication.xap" "$(SolutionDir)DeploySilverlightToSharePoint\ClientBin\ContactsDemo\" /Y” in the Silverlight project SilverlightDataEntryApplication.
5.       BuildSilvelright Project. One file will be copied to DeploySilverlightToSharePoint\ClientBin\ContactsDemo\ location.
6.       Include SilverlightDataEntryApplication.xapfile in SharePoint Project. Build the SharePoint project and deploy the solution.
7.       Open SharePoint Site and Add Silverlight Web part from the media group on the page.
8.       Go to edit web part and Click on Configure button.
9.       Popup will open with one textbox, enter XAP file path as “_LAYOUTS\ClientBin\ContactsDemo\SilverlightDataEntryApplication.xap” and click in OK Button.