Showing posts with label Web Page Design. Show all posts

Saturday, April 20, 2013

JQuery Selectors

JQuery is awesome, effective, powerful, rocking… I don’t have more word to say about JQuery.

In past I have posted some JQuery magic scripts, here I want to share some basic knowledge of JQuery selectors which will helps to target html tags.

jQuery offers a great engine for selecting html tags(elements) in the document which almost gives every filter option (tag name, attribute name, classes , properties etc.) for effective selection.

Here effective selection means, selection will not fail at any condition. Example: New html tags get added or in .Net server side controls id get change on each page load.


/* ########## Select HTML Tags ###########*/

// Get all tags by CSS class name
$(".ms-vb-user").css("display", "none");

// Get all div tags by CSS class name
$("div.ms-vb-user").css("display", "none");

// Get tag by id
var SelectedVal = $('#TDRightArea').text();

// Loop through all matching tags
$('a[href*=/_layouts/userdisp.aspx?ID=]').each(function () {
        var SelectedVal  = $(this).text();  
    });

//Get Parent Tag 
$('#TDRightArea').parent().html();


/* ########## Select and find in HTML Tags ###########*/

$('#TDRightArea').find('div.rightsubarea').each(function () { 
   $(this).css("color", "blue");
});


/* ########## Select .Net Controls ###########*/

// Get Radio Button List selected option
var SelectedVal = $('input[type=radio][id*=RBLLocation]:checked').val();

// Get TextBox entered text
var SelectedVal = $('input[type=text][id*=TxtLocation]').val();

// Get ListBox selected option
var SelectedVal = $("[id*='LBLocation'] option:selected").text();

// Get DropDown List selected option
var SelectedVal = $("[id*='DDLLocation'] option:selected").text();

// Get CheckBox List selected option
var SelectedVal = $('input[type=checkbox][id*=CBLLocation]:checked').next().text();

// Check CheckBox List option is checked, return true or false
var isChecked = $('input[type=checkbox][id*=CBLocation]').is(':checked');


/* ########## Select SharePoint Controls ###########*/

//Get PeopleEditor control value (SharePoint)
var SelectedVal = $("textarea[id*='PeopleEditorManager']").val();

More reference blogs:

http://api.jquery.com/category/selectors/
http://codylindley.com/jqueryselectors/
http://www.w3schools.com/jquery/jquery_ref_selectors.asp
http://www.w3schools.com/jquery/jquery_selectors.asp


ENJOY !!!

Wednesday, August 17, 2011

SharePoint 2010 jQuery: List Scrolling View with Frozen Header


Problem:

Many times SharePoint List has huge amount of records (Number of items) and it’s hard to scroll out the view. Also while scrolling the page we cannot determine which information is from which column.

Solution:

By simple applying CSS we can achieve the Frozen Headers like Excel Sheet. And for achieving the same we use JQuery.

Implementation: 

1. Go to List View Page and Html Form Webpart on the same page.
2. Copy Following code in Html Form Webpart. Just replace the LISTID and VIEWID (Highlighted in yellow color).

<script type="text/javascript" src="/Style Library/jq.Smoothness/js/jquery-1.5.1.min.js"></script>
<style type="text/css">
<!--
.DataGridFixedHeader { position: relative; top: expression (this.offsetParent.scrollTop); background-color: gray;}
-->
</style>
<script type="text/javascript">

$(function(){

var $table = $("TABLE[ID^='{F1D2645C-4CC3-458C-BC93-CBCFECD12171}-{5AB46E0C-D38F-4FF2-BBE0-0D485CC351E9}']:first","#MSO_ContentTable");

<!--WRAP TABLE IN SCROLL PANE-->
$table.wrap("<DIV style='OVERFLOW: auto; HEIGHT: " + (screen.height-400) + "px'></DIV>");

<!--FROZEN HEADER ROW-->
$("TR.ms-viewheadertr:first", $table).addClass("DataGridFixedHeader");

});

</script>

Note:
For IE8 and IE9 browsers, require change in CSS class .DataGridFixedHeader  as follows.
 position: absolute;
Output:

Tuesday, August 9, 2011

Change look and feel of SharePoint Page using JQuery or Apply business logic to SharePoint List Forms using JQuery


As SharePoint 2010 gets popular, more and more scenarios are coming which most of required customization.
As we know SharePoint 2010 provides many options to customize the SharePoint Website, some of listed below…
 
1.    Visual Studio Development
2.    SilverLight Devlopment
3.    ECMA Script Development
4.    JQuery


In this post I am exploring the JQuery Development possibilities in SharePoint 2010.
As jQuery is a fast and concise JavaScript Library. We can easily give dynamic look to SharePoint Website and can also add custom business logic.
Let start the demonstration….

Take a scenario that we have to create Employee Registration Form with Tabular look and also enable disable tabs according to check box or radio button selection.

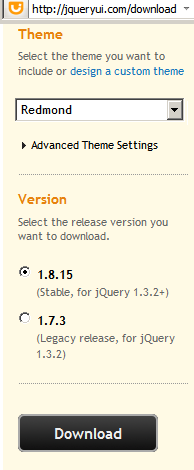
1.    First of all Download JQuery from jqueryui.com

2.    Extract downloaded zip file and Copy all files into SharePoint Site (You can copy all files to Document Library or Can do Drag and drop using SharePoint Designer)


3.    Add following JQuery References to master page before </head> tag.

 <!--JQuery References --> 
<link type="text/css" href="jquery-ui-1.8.15.Redmond/css/redmond/jquery-ui-1.8.15.custom.css" rel="stylesheet" />     
<script type="text/javascript" src="jquery-ui-1.8.15.Redmond/js/jquery-1.6.2.min.js"></script> 
<script type="text/javascript" src="jquery-ui-1.8.15.Redmond/js/jquery-ui-1.8.15.custom.min.js"></script>


4.   Create SharePoint List.
      For demo purpose I have created Employees List and added 5-8 columns.

5.    Create a new list Form of type New Item.(You can set it as default)


6.   Edit List form in Advanced Mode.


7.    As we want to display form in tabular, so we have to add JQuery Tab schema as follows ..


<!-- Tabs -->
<h2 class="demoHeaders"> Employee Registration Form</h2>
<div id="tabs">
    <ul>
        <li><a href="#tabs-1">Personal</a></li>
        <li><a href="#tabs-2">Contact</a></li>
        <li><a href="#tabs-3">Office</a></li>
        <li><a href="#tabs-4">New Hire</a></li>
        <li><a href="#tabs-5">Contractor</a></li>
        <li><a href="#tabs-6">Desktop</a></li>
        <li><a href="#tabs-7">Laptop</a></li>   
              </ul>
    <div id="tabs-1">
                   <table border="0" cellspacing="0" width="100%">

                   </table>
              </div>
    <div id="tabs-2">
                   <table border="0" cellspacing="0" width="100%">

                   </table>
              </div>
    <div id="tabs-3">
                   <table border="0" cellspacing="0" width="100%">

                   </table>
              </div>
</div>

8.    Modify JQuery Schema, Add columns to respective tab DIV;


 9.    Open newly create list form in browser; Select edit page from Page Tab.
        Add "HTML Form Web Part", go to WebPart properties; add following code using "Source Editor".


<script type="text/javascript">
            $(function(){
                // Tabs
                $('#tabs').tabs();                           
            });
</script>
<script type="text/javascript">
    $(document).ready(function () {
        //debugger;
        $('#tabs').tabs("option", "disabled", [3, 4, 5, 6]);
        $('input:radio').each(
                  function () {
                      this.onclick = function () { RadioBtnEvent(this) };
                  }
              );
        $('input:checkbox').each(
                  function () {
                      this.onclick = function () { CheckBoxEvent(this) };
                  }
              );
    });

    function RadioBtnEvent(RedioBtn) {
        if (RedioBtn.parentElement.title == "New Hire") {
             if (RedioBtn.checked) { EnableTab(3); DisbleTab(4); }
            else { DisbleTab(3); }
          
        }
        else if (RedioBtn.parentElement.title == "Contractor") {
             if (RedioBtn.checked) { EnableTab(4); DisbleTab(3); }
            else DisbleTab(4);
          
        }else {
            DisbleTab(5);
            DisbleTab(6);
        }
    }

    function CheckBoxEvent(CheckBoxCtrl) {
        if (CheckBoxCtrl.parentElement.title == "Desktop") {
           if (CheckBoxCtrl.checked) EnableTab(5);
            else DisbleTab(5);
        }
        else if (CheckBoxCtrl.parentElement.title == "Laptop") {
           if (CheckBoxCtrl.checked) EnableTab(6);
            else DisbleTab(6);
        }
      
    }

    function EnableTab(TabIndex) {
        $('#tabs').tabs('enable', TabIndex);
    }

    function DisbleTab(TabIndex) {
        $('#tabs').tabs('disable', TabIndex);
    }
</script>

10.    Output

Conclusion: We can use JQuery in SharePoint 2010; And it takes less time to use JQuery in SharePoint but more time to post a blog on it.

Tuesday, April 19, 2011

Basic of Webpage Designing

May times while creating a webpage we need to add tables or text blocks into the page.
I have posted a blog on designing the simple Html page in DIV tags.
You can find more information on following link…
http://awebsiteschool.com/uncategorized/basic-of-webpage-designing